Connecting to BI Tools
Magpie supports a variety of business intelligence and data visualization tools. The platform's flexible data lake architecture allows it to serve as a hub for your enterprise data, and its underlying compute capabilities allow for ad hoc analysis and visualization.
All connections require either a Magpie username and password or a personal access token for authentication, the host name of your Magpie instance, and the BI tool connector path for the cluster that you want to connect to. You can retrieve the BI tool connector path for a cluster by running the describe cluster command in Magpie. Make sure the cluster is running when connecting from the BI tool.
A parameter of unstagedResultLimit can be added to the list of additional parameters to ensure results sets are capped at a reasonable limit to speed up queries.
Looker
On your Looker instance, navigate to the Admin > Connections page. The information below provides the associated connection information; replace the username and password for the appropriate Magpie credentials(set username to “access_token” and your access token as the password if using a personal access token) , <org>.silect.is with your Magpie host name, and <http-path> with the BI tool connector path for your selected Magpie cluster. This guide provides helpful instructions and troubleshooting: Connecting Looker to Your Database.
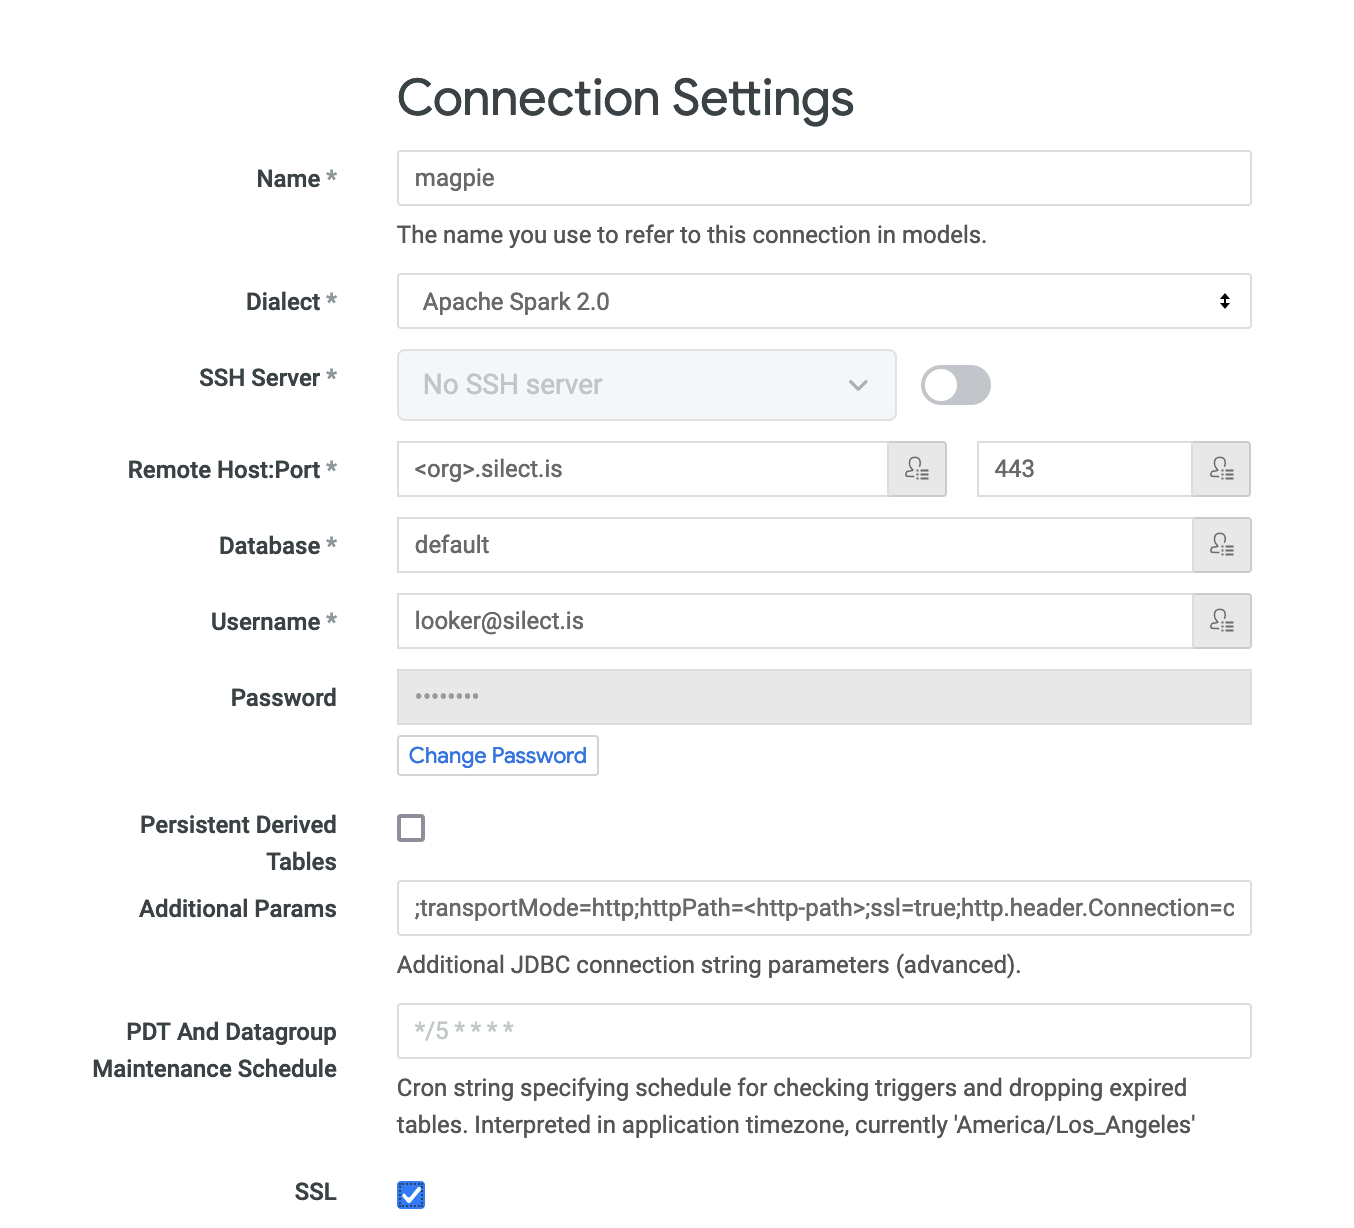
Additional params should be:
;transportMode=http;httpPath=<http-path>;ssl=true;http.header.Connection=close#unstagedResultLimit=<integer>
Tableau
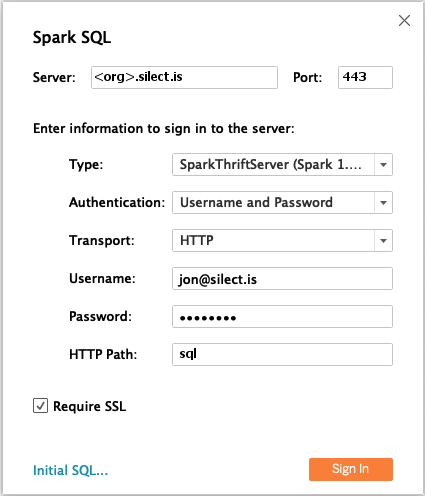
On your Tableau homepage, navigate to the Connect pane on the left side of the Start page. Select the Spark SQLconnector. The screenshot below provides the associated connection information; replace the username and password for the appropriate Magpie credentials(set username to “access_token” and your access token as the password if using a personal access token), <org>.silect.is with your Magpie host name, and the HTTP Path with the BI tool connector path for your selected Magpie cluster. For example, the HTTP Path for many customers will be /clusters/main/sql. This Tableau guide provides helpful instructions and troubleshooting: Connecting Tableau to a Spark SQL Database.
JDBC
Magpie supports connections over JDBC, in turn supporting a much larger number of BI tools than are presented here.
To use a custom JDBC connection, you'll need to download the JDBC jar here and install the JAR per the instructions of your tool. Then utilize the connection string below, replacing <org>.silect.is with your Magpie host name and <http-path> with the BI tool connector path for your selected Magpie cluster. Use your Magpie username and password when connecting(set username to “access_token” and your access token as the password if using a personal access token).
jdbc:hive2://<org>.silect.is:443/;transportMode=http;httpPath=<http-path>;ssl=true;http.header.Connection=close
PowerBI
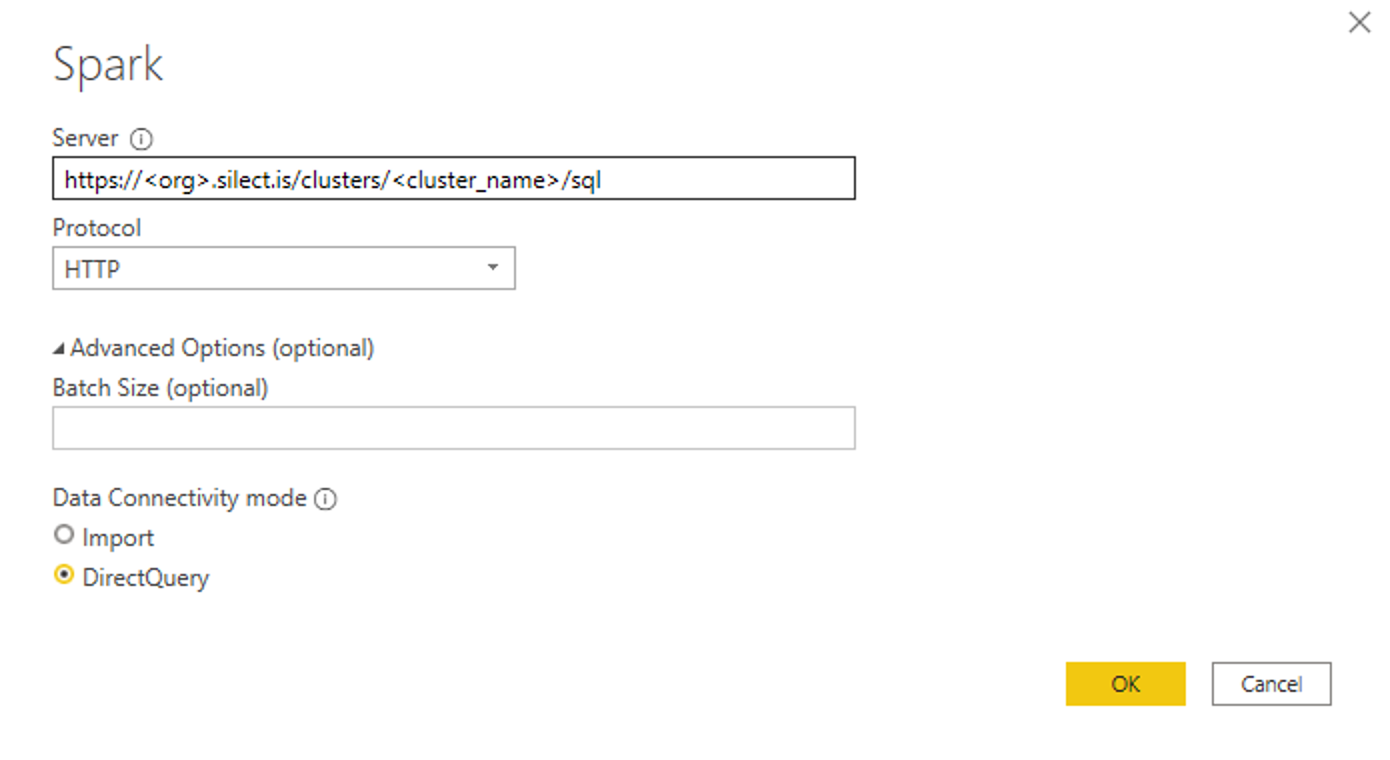
From PowerBI Desktop, click Get Dataand search for the Spark connector. Enter the connection details below, swapping out your organization and cluster names in the server string.
Server: https://<org>.silect.is:443/clusters/<cluster_name>/sql
Protocol: HTTP
Data Connectivity Mode: DirectQuery
Click OK. On the next page, enter your Magpie username and password and click Connect.
MicroStrategy
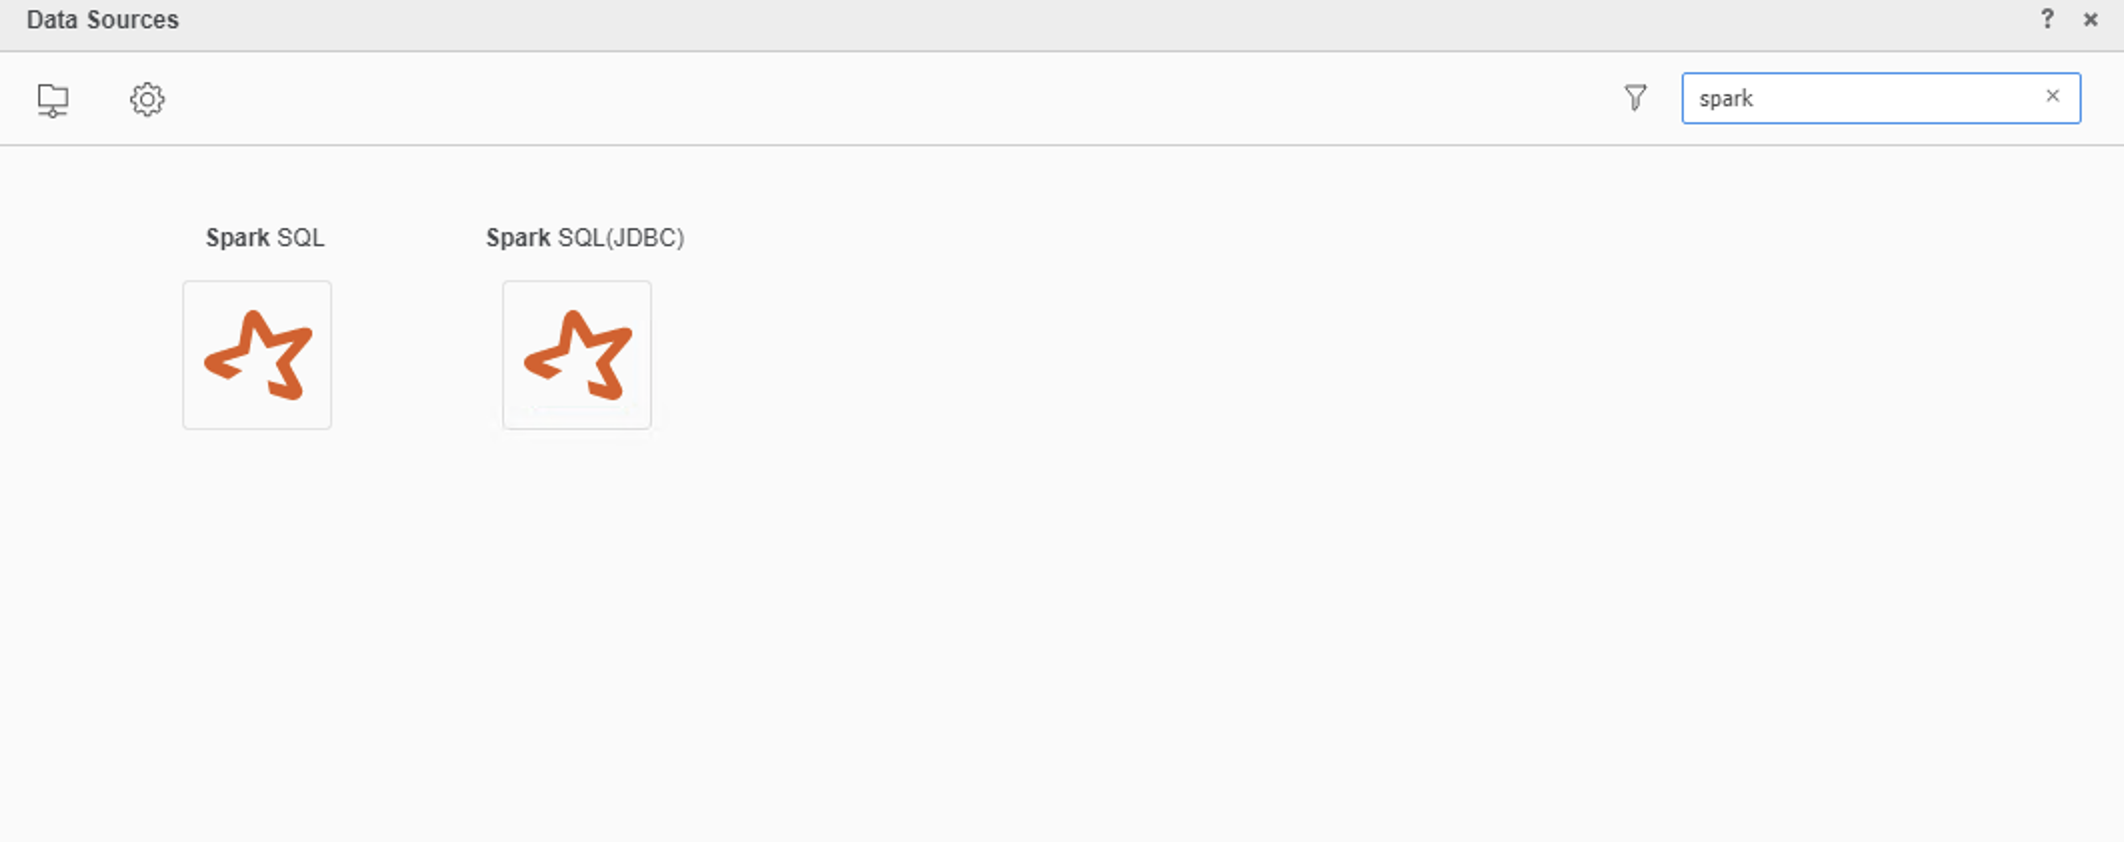
In a Dossier, click the New Data button, search for Spark, and select Spark SQL (JDBC). Magpie supports both the ODBC and JDBC drivers for Spark, but we recommend using the JDBC driver for the best experience.
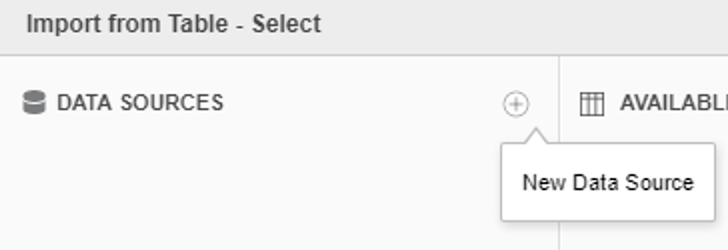
Then, choose Select Tables under import options. On the Import from Table screen, click the + icon to create a new Data Source.
In the Data Source screen, select Spark SQL in the Database field and Spark SQL 2.x in the Version field.
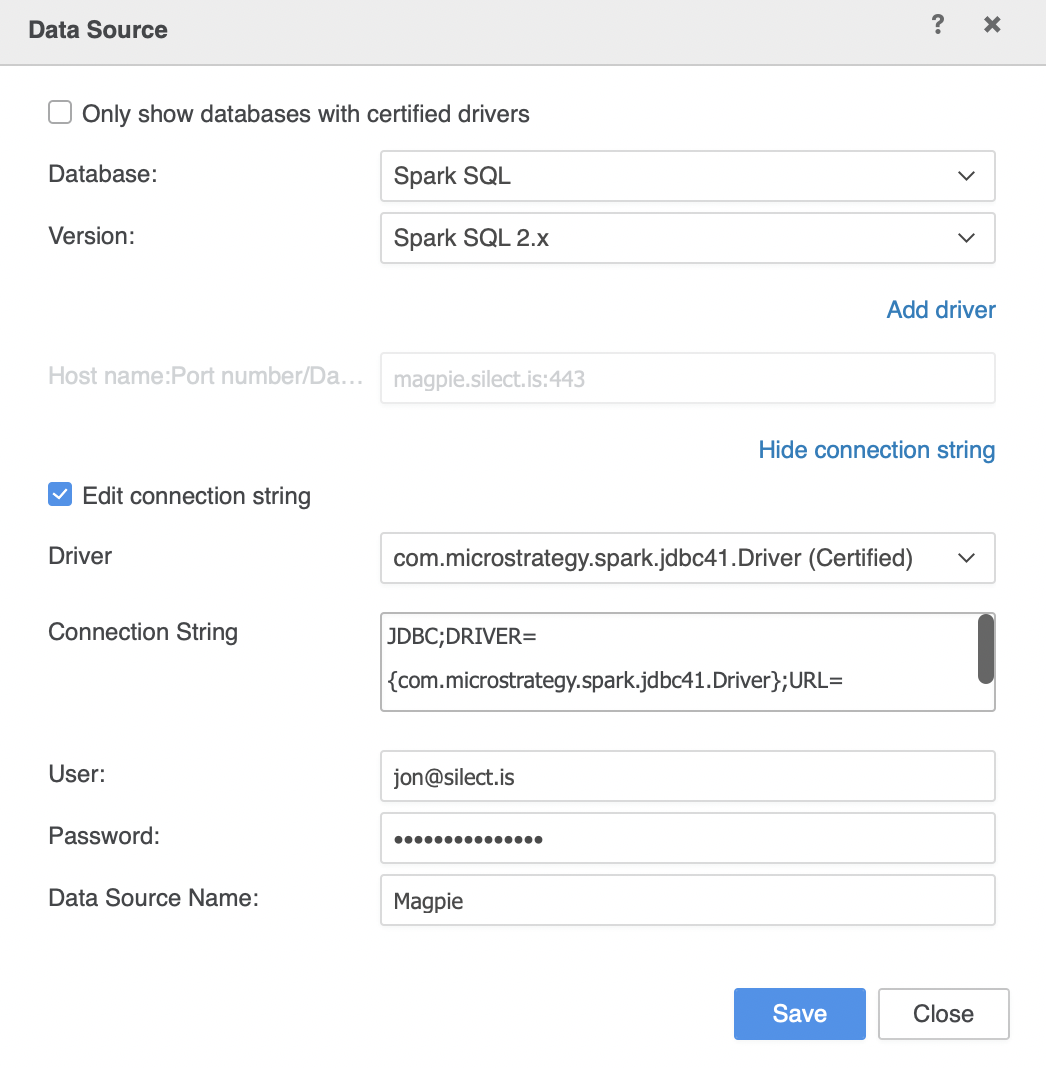
At the bottom of the screen, click the Show connection string link and populate the connection string using the template below, replacing <org>.silect.is with your Magpie host name and <http-path> with the BI tool connector path for your selected Magpie cluster. Finally, enter your Magpie username and password in the User and Password fields, and give your Magpie data source a name in MicroStrategy.
JDBC Connection String: (Windows or Mac)
JDBC;DRIVER={com.microstrategy.spark.jdbc41.Driver};URL={jdbc:spark://<org>.silect.is:443;DatabaseName=default;AuthMech=3;transportMode=http;httpPath=<http-path>;ssl=1;http.Connection=close};
ODBC Connection String: (Windows only)
DRIVER={MicroStrategy Spark ODBC Driver Client};HOST=<org>.silect.is;PORT=443;DATABASE=default;UseNativeQuery=1;DefaultStringColumnLength=4000;AuthMech=3;SparkServerType=3;ThriftTransport=2;HTTPPath=<http-path>;SSL=1;